Tag Archives: Home

Baking Bread on the Weber

IMG_1413 IMG_1412

So it’s been a few weeks since my last blog post…… It really hasn’t been my intention but going into full time study and being a mum, a wife etc etc etc has kept me very busy. But alas all the stars have aligned and I have had a free weekend.

IMG_1409

well almost all the stars anyway………. I am oven-less, I know right OMG NO OVEN, to me thats like having no arms 😦 . MY oven door has broken and hubby is waiting on the parts to arrive…….. waiting waiting waiting.

IMG_1408

So this weekend I decided to improvise and I fired up the Weber to bake some bread. So for my first time baking bread in the Weber I must say I am very pleased.

IMG_1407

IMG_1405

Hamburger cake and biscuit fries

IMG_1382

Well another week has been gone by, time goes so quickly……

This week it was my youngest son Alex’s 9th birthday, I can’t believe my baby has turned 9. So exciting to watch them grow, but I wish I could slow it down just a little!!!!!! I remember when I had my first son Aden and so many people said to me, enjoy every second because it will be gone before you know it, man they weren’t kidding……………..

IMG_1383

So of course birthday means, birthday cake. I love making the kids birthday cakes some years they pick what they want and other years I surprise them. This year it was a surprise for Alex, one of Alex’s favourite foods is hamburgers, and I have seen some great hamburger cakes on the internet, So it was a hamburger cake and biscuit fries for Alex this year.

IMG_1380

The look on his face when he saw his cake was priceless, that look alone was enough for all the hours I spent baking and decorating. Big eyes, a big smile and a big hug what else could a mum possibly ask for.

IMG_1386

IMG_1381

I didn’t really follow a recipe to create this cake, I basically made two butter cakes and one chocolate cake, the chocolate cake being for the meat patty. I used plastic icing, red for the tomatoes cut into circles and yellow for the cheese, cut into squares. For the lettuce I used butter cream coloured green, which I piped on. I then covered the butter cake in a light brown icing to make the burger roll I had two shades of the brown butter cream to add some depth. once iced I sprinkled with sesame seeds.

To make the biscuit fries, I made a simple short bread which I rolled out into squares and then scored in some straight lines the width I wanted my fries to be. I brushed with egg white and sprinkled with raw sugar, then baked. Once cooled I cut along the score lines to create my fries.

Cabbage Rolls (Golabki) and a family reunion

IMG_1351

I have just recently made contact with my Nanna after 27 years, the last time I saw her I was 10 years old…..I know a long long time. Seeing my Nanna after so many years was both exciting and nerve racking, so many emotions rushing through me. Hubby and kids came with me, I proudly got to introduce her to her great grandchildren and my fabulous hubby, so many years of lost contact, but still we are family, and there is something very special about family. Family is something you belong to, part of who you are, where you have come from and it gives you a sense of worth. It is nice to know you belong somewhere, are a part of something.

DSCN3695

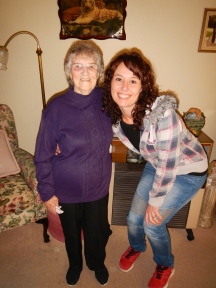
My Nanna is an immigrant from Germany and she told us her story of coming to Australia with my Pop who sadly passed away 5 years ago. She told us some lovely stories, one I especially loved was about her and my pop (who is Polish) meeting  during the war, a real love story. She is a sweet, lovely, kind strong and independent woman and at the amazing age of 90 still living on her own.

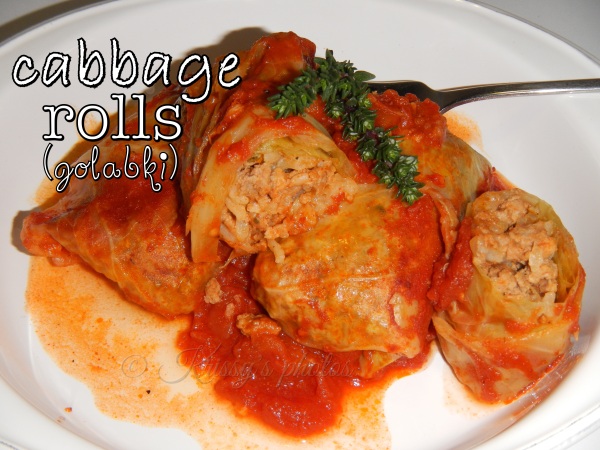
I have some early childhood memories of my Nanna, I remember Mum taking my sister and I to her cute little cottage to see her and Pop. Every time we visited my Nanna would always make Cabbage rolls, potato salad and cucumber salad, I loved it and it was one of my favourite meals and nobody could make it like Nanna.IMG_1350

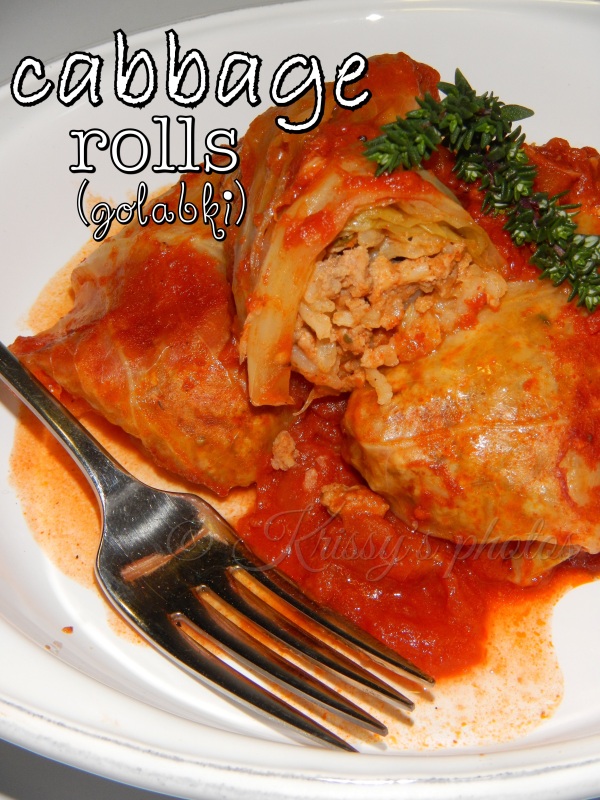
After seeing my Nanna I of course had to make Cabbage Rolls, now unfortunately I do not have her recipe, and although it was not exactly the same it was still delicious.

I find it amazing how foods, tastes and smells can bring back memories and feelings. When I was eating this meal if I closed my eyes I could see myself sitting at her kitchen table, I could hear the chatter between my mum and Nanna, the chickens clucking outside, I can see my pop in his overalls sitting opposite me calling me his little munchkin. Nice memories they bring a smile to my face and warm my heart.

IMG_1349

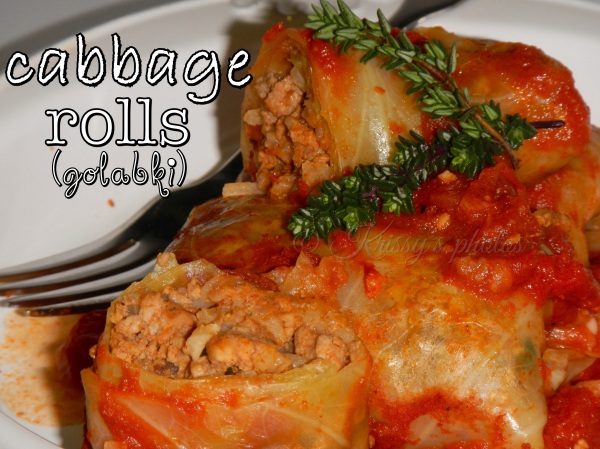
So having shared all this with I will now share my cabbage rolls, which I have adapted from several different recipes on the internet.

RECIPE:

  • 1 large savoy cabbage
  • 1/4 cup rice
  • 1 Tsp oil
  • 11/2 Tsp paprika
  • 2 tsp fresh thyme, leaves removed from stems and chopped
  • 2 cloves garlic, finely chopped
  • 1 onion, finely chopped
  • 250g pork mince
  • 250g beef mince
  • 1 bottle passata
  • 1 tsp hot paprika (optional)
  • 1 tsp smoked paprika
  • 2 cloves garlic, crushed

METHOD:

  1. bring a large saucepan of lightly salted water to the boil over medium high heat
  2. add cabbage and simmer for 5 minutes, then turn cabbage over and simmer for another 5 minutes. Turn off heat and let sit for 10 minutes, using a slotted spoon carefully remove cabbage from saucepan and let cool
  3. heat oil in fry pan over medium-low heat gently sauté onion, once onion is soft add garlic,sauté for 1-2 minutes
  4. add paprika, thyme, rice, pork and beef mince ,using a wooden spoon breaking up the lumps as you go cook until mince is brown
  5. season to taste with salt and pepper
  6. gently remove leaves from the cabbage
  7. place 1 leaf on work bench, using a sharp knife remove the thickest part of the stem
  8. place 1-2 Tsp of mince mixture onto cabbage leaf, fold in ends and roll up firmly to enclose filling, repeat with remaining leaves
  9. heat oil in a large saucepan add garlic and paprikas and sauté for 1-2 minutes
  10. add passata, stir to combine and season to taste
  11. gently place cabbage rolls in sauce seam side down, cover with lid and simmer gently for 40 minutes, checking occasionally making sure sauce is not sticking


Peanut butter chocolate slice

image

So I have had an amazing start to this week, and that is the reason it has been a little while since I have written a post. We are away on a family holiday and although I had great intentions of keeping up with my blogging, family and fun have just taken up all my time. We have been staying in Canberra catching up with family, the kids are having a great time with their cousins and I love seeing them all together it is so nice. We then all headed off to the snow and spent two nights in Jindabyne which is only a short drive to Perisher were the kids had a great time tobogganing.

image    image

But the title of this post is not My Family Holiday, its Peanut butter chocolate slice. I made this slice just before we left to go on holidays and to quote the kids “mum this is the best slice EVA”. Now I’m not sure if it is the best slice ‘EVA’ but it really is pretty darn good.

imageimage
The bottom of the slice is very much like a chocolate brownie and the peanut butter topping is perfect. I will be honest and say that I didn’t quite know what to expect with this slice but the combination of the peanut butter icing sugar and lemon really works. It is not too peanut buttery, not too sweet its just right and the slice in all is perfectly balanced and yummy. I will definitely been making this slice again YUM YUM YUM…..:-)

RECIPE:

  • 150g dark chocolate
  • 100g unsalted butter
  • 2 eggs
  • 150g caster sugar
  • 1 cup plain flour
  • ¼ cup cocoa powder
  • 2 cups smooth peanut butter
  • 1¼ cups icing mixture
  • juice of ½ lemon
  • 200g milk chocolate
  • ¼ cup toasted peanuts, chopped

METHOD:

1 Preheat oven to 160°C. Combine the chocolate and butter in a heatproof bowl and set over a saucepan of simmering water, stirring until just melted. Add the eggs and sugar and beat until smooth. Sift in the cocoa and flour, then spoon into a lined 20cm square cake tin and bake fro 40 minutes, until just set. Cool in the tin.
2 Combine the peanut butter, icing mixture and lemon juice in a bowl and whisk until smooth. Pour over the cooled chocolate slice, then refrigerate for 2 hours, until set.
3 Melt the milk chocolate gently and spread over the peanut butter layer. Sprinkle with chopped peanut, refrigerate for 1 hour, then cut into bars and serve.

image

This is a Fast Ed recipe :http://www.fast-ed.com.au/peanut-butter-slice/

Avocado Ice-cream

IMG_1299

I love making ice-cream I know not really a winter dessert. But  ice-cream being an amazing dessert all on its own, also makes for the perfect accompaniment to so many desserts, even in the middle of winter.

I came across this recipe in my latest edition of delicious magazine, and always wanting to try new and interesting flavours in my ice-cream making I knew I had to make this avocado ice-cream. I have heard of this flavoured ice-cream before but have never tried it until now, and just let me say it does not disappoint :-). The texture of the avocado is perfect for ice-cream and put together with the cream and lime juice AMAZING!!!!.

IMG_1300

RECIPE:

  • flesh of 4 avocados
  • juice of 2 limes
  • 200g caster sugar
  • 300ml thickened cream
  • 1 tsp vanilla extract

method;

  1. blitz avocado and lime juice in a food processor until a smooth puree
  2. beat sugarand cream with electric beater to combine
  3. add avocado and vanilla, whisk until well combined
  4. place into ice-cream machine and churn as per machine instructions

nb (I like to refrigerate my mix for several hours or overnight before churning in the ice-cream machine)

Mascarpone and cinnamon ice-cream

IMG_1312

I had a big to do list today and as clock is moving towards school pick-up time, my list has been barely touched. I started off with great intentions, first thing this morning I headed off for a massage and boy was it good. Maybe a little too good I came home all relaxed and really very unenthused to start attacking my list well!!!! there is always tomorrow :-).

IMG_1314

So while talking about things that make you feel good this Mascarpone and cinnamon ice-cream is one of them, smooth, rich and creamy even now in winter this ice-cream is a pure pleasure to eat. Delicious all on its own which is how I had it yesterday for my lunch, yeah  I know not too healthy. But I rationalised this by all the hard work I did afterwards in the garden, busily pruning back my fruit trees (also why I needed that massage today I’m just a wee bit sore) that would of definitely had to burn of a few calories (well thats what I’m telling myself anyway :- ).This ice-cream also works amazingly as an accompaniment to poached fruit. I made some delicious poached pears in red wine served with the mascarpone and cinnamon ice-cream, which we had for dessert, post coming soon, I have also served this ice-cream with poached quince and a plum tart.

IMG_1315

IMG_1316

IMG_1317

RECIPE;

  • 11/2 cups sugar
  • 1/3/4 cup water
  • 2 tsp cinnamon
  • 450g mascarpone cheese
  • 1/2 cup cream

METHOD:

  1. place sugar and water into a saucepan over low heat, stir until sugar has dissolved
  2. simmer for 3 minutes, remove from heat and allow syrup to cool
  3. mix syrup with mascarpone and cream
  4. place and an ice-cream machine and churn as per machine instructions.

I like to refrigerate my mix for several hours or overnight before churning.

recipe is from the Marie Claire cook book ‘flavours’

Rainbow layered birthday cake

IMG_1265

This week it was my beautiful daughter Kiara’s 12th birthday, my how time flies. Every year on my kids birthdays I always think back to the day that they were born, I regularly look at the time and think now I was going to the hospital, or now I was in heavy labour, or now I was holding you for the very first time.

That very first time, the moment you never forgot, meeting your baby seeing their tiny little hands, touching their soft skin, breathing in their sweet smell, you fall in love in an instant a love that lasts forever that unconditional love where you will do anything to protect them. I love being a mother hands down it’s the greatest thing I have ever done. Now there are tough days, sometimes I feel like I’m in a boat without any paddles, but with all the difficulties and hard decisions that come along with motherhood it’s all worth it. They are a joy and as I said before my greatest accomplishment.

IMG_1263

So cake, what birthday would be complete without a birthday cake. This year for Kiara I went for bright fun colours in a rainbow layered cake. I have seen a few of these cakes floating around on the internet and face book and thought one would be perfect for Kiara’s birthday, those bright colours certainly match her bright happy personality…

IMG_1262

  • To make cake I just used my favourite trusted butter cake recipe (handed down to me from my mum) and adding food colouring for each of the layers.
  • The icing is a vanilla cream cheese icing I used cream cheese icing as it’s Kiaras favourite, butter cream would also been fine
  • To decorate I brought Satin Ice coloured fondant, I have tried a few different brands of fondant and Satin Ice is my favourite it is so easy to work with and comes in a great range of colours. Using a small flower cutter I cut out flowers then using a small plain nozzle piping tip I pushed a hole through the centre of each flower, then used my decorating tool to add definition to the flowers.
  • I randomly  placed onto cake leaving the heart shapes plain. I then added couhons to the centre of each flower and around the heart to define.

IMG_1264

Apple blackberry and port crumble

IMG_1247

There is not much to say really about this dessert except that it is absolutely, no doubts about it ‘delicious’. The port in this recipe brings the humble crumble to a whole new level. I used a beautiful port from our gorgeous South Australian Barossa Valley, that I collected on my last wine visit.

IMG_1244

This crumble has a deep richness to it, it’s sweet but not too sweet, the apple is cooked so it still holds its shape, the berries are soft and a little tart and the port is reduced down to a sweet syrup which brings it all together. Then of course there is the crumble topping that brings texture and crunch and a little bit of earthiness with the walnuts.

IMG_1245

A perfect winter dessert that warms the soul and makes you feel good inside, like comfort food should.

RECIPE:

  • 6 large green apples
  • 300g blackberries
  • 50 g unsalted butter
  • 250ml port
  • 1/2 tsp cinnamon
  • 2 Tsp caster sugar

Topping

  • 100g unsalted butter
  • 3 Tsp plain flour
  • 2 Tsp coconut
  • 3 Tsp brown sugar
  • 3 Tsp rolled oats
  • 3 Tsp roughly chopped walnuts

METHOD:

  1. preheat oven to 180ºC
  2. peel, core and slice apples in 1cm slices
  3. melt butter in a saucepan over medium heat add apples and stir occasionally until apples begin to soften
  4. add blackberries, sugar, cinnamon and port, cook gently until juices start to come out of the fruit
  5. using a slotted spoon scoop fruit into either individual dishes or a large casserole dish
  6. leave the port and fruit juices on medium heat and reduce until you have a syrupy liquid about 10-15 minutes
  7. spoon liquid over the fruit

Topping

  1. combine all ingredients into a bowl and using finger tips gently rub butter through mixture
  2. spoon crumble mix over fruit
  3. bake in oven for 20 minutes or until top is golden brown
  4. serve with ice cream or custard

IMG_1246

Spicy Fish Curry

IMG_1207

The rain has been tumbling down most of the night, and now outside its drizzly, wet, grey  and cold. I’m really not a fan of winter, about the only bonus I can find to those grey dull days are those delicious heart warming, soul reviving curries.

IMG_1204

So Spicy Fish Curry for dinner it is . I grabbed this recipe straight out of my latest issue of Donna Hay magazine, flicking through looking for inspiration this curry caught my eye almost immediately. The fresh red chilli curry paste is vibrant and bursting with flavour and is so quick and easy to throw together.

IMG_1205

This curry takes very little time at all to make, with a maximum punch on flavour. So its great for a mid-week meal, I had this curry whipped up and on the table straight after my daughter has finished ballet lessons, plus time to spare to take photos ( which is a rarity at dinner time). So if your looking for a little soul warming give this curry a go 🙂

RED CHILLI CURRY PASTE RECIPE:

  • 3 long red chillies, roughly chopped
  • 1 tsp shrimp paste
  • 6cm piece ginger (30g), peeled and roughly chopped
  • 2 eschalots (french), roughly chopped
  • 4 cloves garlic, roughly chopped
  • 1/3 cup palm sugar
  • 4 kaffir lime leaves, shredded
  • 1 Tsp peanut oil

METHOD:

  1. Place all ingredients into a food processor and process until smooth
  2. makes 1 cup

SPICY FISH CURRY RECIPE:

  1. 1 Tsp peanut oil
  2. 800g salmon fillets, skin removed and chopped
  3. sea salt flakes
  4. 1 cup red chilli curry paste
  5. 1x 400g tin tomatoes
  6. 1 cup young coconut water ( I didn’t have this so I used coconut milk)
  7. 2 Tsp fish sauce
  8. 2 Tsp lime juice
  9. coriander, mint leaves and fried eschalots to serve

METHOD:

  1. heat oil in a large non-stick fry pan over high heat
  2. sprinkle salmon with sea salt , and cook 1-2 minutes each side or until golden, set aside
  3. add red chilli curry paste and cook stirring, for 2-03 minutes
  4. add tomato, coconut water (milk) and fish sauce and bring to the boil
  5. reduce heat to medium and cook 5-7 minutes or until sauce is slightly reduced
  6. return fish to pan and cook for a further 1-2 minutes or until cooked to your liking
  7. add lime juice stir to combine
  8. top with coriander, mint and fried eschalots to serve.

IMG_1206

Raspberry and apple muffins

IMG_1161

I have been making muffins lately to put into the kids and hubbys lunch boxes for school and work , and they are really enjoying them. I particularly like the base recipe I have been using as it only has a little sugar, 70g which I think is great, the sweetness comes from the fruit that I put into the muffins.

IMG_1163

IMG_1158

I can put these muffins into the kids lunch boxes knowing that they are getting a yummy energy boosting snack, without all those horrible numbers and long words…..also mummy gets to have a clear conscience. I don’t know about you other mums and dads out there but I always suffer a terrible guilt trip when I allow my children to eat processed food. I am a big believer in fresh, local and natural ingriedents and of course homemade when I can.

My youngest son Alex said in the car the other night “can I take some food to share at Drama when its my birthday”, sure  says Daddy “what would you like to take” his reply was simple “something made by mum”. I loved it I’m trying to raise my children to understand and appreciate good food and where it comes from, and I think this simple statement said I’m doing something right.

IMG_1165

RECIPE:

  • 195g plain flour
  • 30g hazelnut meal
  • 2 tsp baking powder
  • 1/2 tsp bicarbonate soda
  • 1/2 tsp salt
  • 100g melted butter
  • 70g vanilla sugar
  • 1 large egg
  • 125ml milk
  • 110g raspberries ( fresh or frozen)
  • 1 medium apple, peeled, cored and diced into small cubes

METHOD:

  1. Preheat oven to 190ºC
  2. combine sifted flour, hazelnut meal, baking powder, bicarbonate soda, salt and sugar into a bowl
  3. add fruit and stir to combine, make a well in the centre
  4. in a separate bowl whisk together egg, milk and butter
  5. pour milk mixture in the centre of flour mix and stir until just combined
  6. spoon into prepared muffin tins
  7. bake for 15-20 minutes or until skewer comes out clean when inserted in centre

IMG_1160

IMG_1159